
On this page
- Remember These Three Things First
- Location, Access and Failure Cost
- Pre-Fight Preparation Checklist
- Phase Breakdown
- Attack Reference: Telegraphs, Responses and Common Failures
- Build-Specific Strategy
- Video Guide with Timestamps
- What Players Commonly Struggle With
- Problems and Direct Answers
- Rewards and Next Steps
- Related Guides
- Sources, Verification and Update Log
Quick Preparation
- Location
- Ogham, Act 1 Finale
- Campaign / Endgame
- Act 1
- Recommended Level
- Level 15–18
- Primary Damage Types
- Physical · Cold
- Editorial Difficulty
- Medium
QUICK ANSWER
Remember These Three Things First
Keep your character in a position where you can observe the boss dash direction. Prioritise lateral movement space over killing distant wolves.
Only clear minions that block your movement path or continuously interrupt your actions.
Put cold resistance, movement speed and recovery on the same checklist. Do not only look at DPS.
Move first after seeing a telegraph, then find an output window. Stop attacking during phase transitions.
Identify which specific attack killed you, then go to the matching troubleshooting entry instead of blindly swapping gear.
ACCESS & CONTEXT
Location, Access and Failure Cost
Main story progression leads here naturally. No separate endgame entry materials required.
Phase transitions change attack density, visibility and safe movement zones.
You can retry immediately from the checkpoint. No material cost for campaign attempts.
Defeating Count Geonor completes Act 1 and unlocks the Act 2 campaign.
BEFORE THE FIGHT
Pre-Fight Preparation Checklist
| Done | Check | Why it matters | Quick fix |
|---|---|---|---|
| Cold resistance and effective life Multiple phases apply cold pressure and melee hits simultaneously. | Frost attacks in human and wolf phases deal significant cold damage on top of physical hits. | Temporarily swap rings, amulet or resistance affixes. Even a 10% improvement reduces consecutive-hit deaths. | |
| Boot movement speed Determines whether you can leave an attack line before the telegraph completes. | The fog dash and wolf leap have short wind-ups that punish slow characters. | Prioritise boots with movement speed. You do not need rarity — a magic pair with 20% speed helps immediately. | |
| Single-target damage rotation The longer the fight lasts, the lower your margin in the fog phase. | Extended fights mean more fog-phase repetitions and more chances to be caught. | Separate your mapping and boss skill setups. Verify that support gems actually match your main skill tags. | |
| Recovery and resources Phase transitions drain resources while you cannot deal damage. | Players often use all flask charges during the human phase, leaving none for the high-pressure wolf phase. | Save at least two flask charges for the wolf phase. Remove high-cost supports that contribute little single-target damage. | |
| Mobility and crowd control Being slowed then rolling may already miss the safe window. | Cold damage applies chill and freeze, reducing your ability to reposition. | Confirm your dash skill is available. Understand that dodge roll cannot escape persistent ground effects. |
PHASE BREAKDOWN
Phase Breakdown
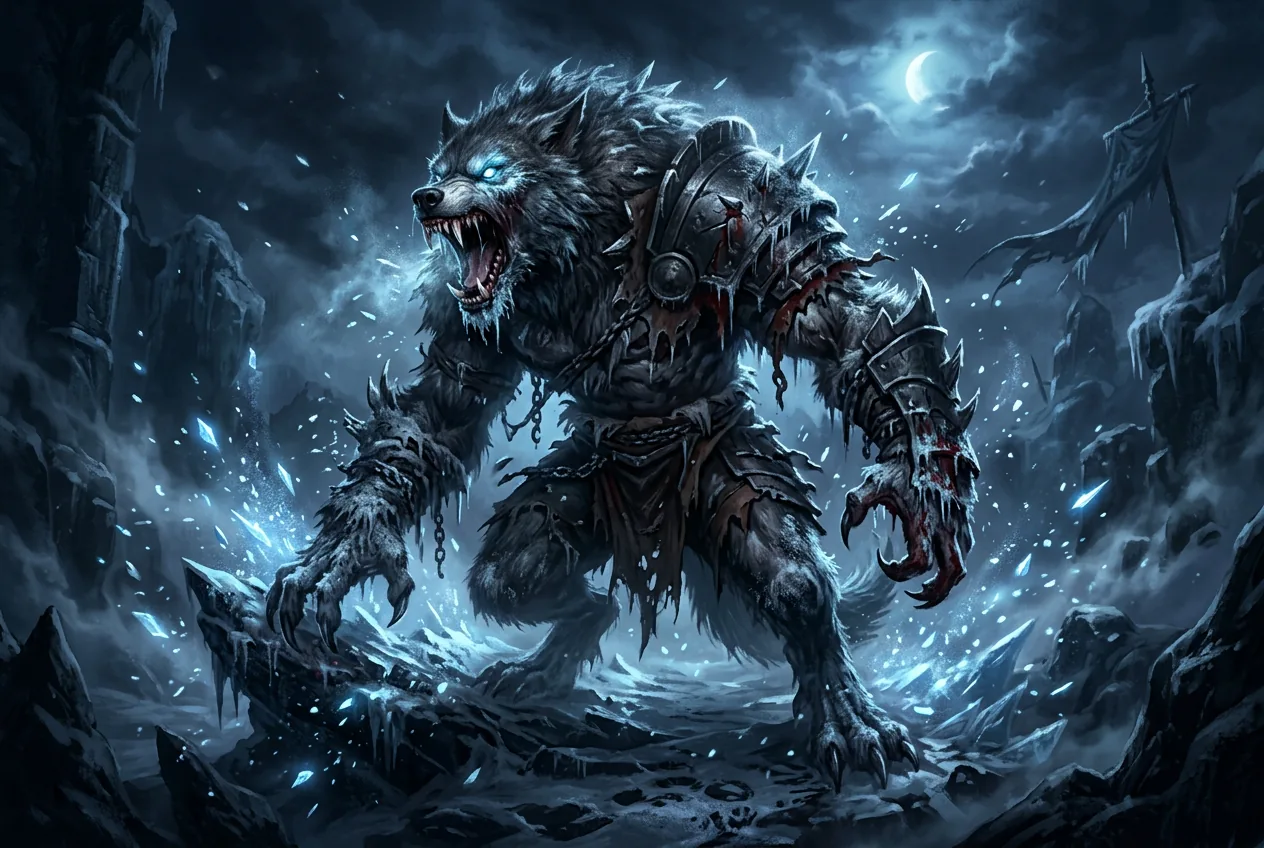
Phase 1 · Phase 1: Humanoid
Trigger: Fight starts at full health.
Objectives- Learn the weapon swing tell and the ground-rune pattern.
- Stay to the side-rear and watch for the end of his attacks.
- Save recovery resources for later phases.
The humanoid phase is the best time to learn the boss's rhythm. Don't use long combos—wait for the swing to finish, then land a full single-target rotation.
Frost runes appear under your feet. Step out first, then decide whether you can return to deal damage.
ATTACK REFERENCE
Attack Reference: Telegraphs, Responses and Common Failures
| Attack | Telegraph | Response | Common mistakes | Danger |
|---|---|---|---|---|
| Frost ThrowPhase 1: Humanoid | Raises weapon high with a brief pause. A frost glow appears on the blade. | Move to the side-rear to avoid the linear impact zone. | Backing into the arena wall, leaving no escape for the next attack. | Med |
| Armoured ChargePhase 1: Humanoid | Body lowers and aims toward the player with a charging pose. | Move laterally or dodge-roll after the lock-in completes. | Rolling too early — the boss re-aims before the dash fires. | High |
| Fog DashPhase 2: Wolf (includes the mist sub-phase) | A voice line plays just before the boss emerges from the fog. | Maintain lateral movement. Leave room for a second direction change. | Stopping to cast while clearing minions, becoming a stationary target. | High |
| Summon WolvesPhase 2: Wolf (includes the mist sub-phase) | Multiple targets appear at the arena edges. | Only clear wolves blocking your movement route. Keep watching the boss. | Chasing distant wolves and losing boss visibility. | Med |
| Wolf Leap StrikePhase 2: Wolf (includes the mist sub-phase) | Head raises, body pulls back, then locks onto a landing spot. | Wait for the landing marker to appear, then leave the marked area. | Chain-rolling on head-raise, exhausting all movement space before the actual landing. | High |
| Chilling Frost BreathPhase 1: Humanoid · Phase 2: Wolf (includes the mist sub-phase) | The boss inhales visibly and frost particles gather at the mouth. | Dodge-roll to the side. The breath covers a frontal cone. | Standing still because the cone looks narrow — it is wider than it appears. | High |
BUILD-SPECIFIC STRATEGY
Build-Specific Strategy
Melee: Do not treat 'staying glued to the boss' as the goal. In the human phase, practise entering after his swing ends. In the fog phase, prioritise survival and boss visibility. In the wolf phase, only commit a full rotation after a complete combo ends.
Ranged: The most common ranged failure is retreating to the arena wall. Maintain mid-distance lateral movement. Use short-cast skills to add damage between boss attacks rather than continuous backpedalling.
Minion: You still need to actively observe the boss. Do not stand still because your minions are dealing damage. In the fog phase, keep your character moving and confirm your minions have not dragged the fight to the visibility edge.
Low movement speed: Stay near the arena centre. Pre-position before attacks land. Use only the shortest animation skills. Do not wait for the danger zone to fully appear before moving — react to the telegraph start.
- If damage feels too low, verify your skill-setup, weapon base damage and support compatibility before upgrading gear.
- If survival feels impossible, separate resistance, effective life and movement space into three independent checks.
VIDEO & TIMESTAMPS
Video Guide with Timestamps
sirgog
Count Geonor Definitive Boss Guide — All Abilities and Tips
Full two-phase breakdown with all abilities shown and build-agnostic tips.
Open source ↗EODGamerz
Count Geonor Boss Mechanics Guide and Build Tips
Mechanics overview with build-specific preparation advice.
Open source ↗COMMUNITY EVIDENCE
What Players Commonly Struggle With
Why do I keep dying in the fog phase even with cold resistance?
A player describes stopping to clear wolves during the fog, then being hit by the boss dash and ground effects in quick succession.
This is not purely a cold resistance problem. Visibility, stationary time and movement route all fail simultaneously when players prioritise add-clear over positioning.
Maintain lateral movement first. Only clear wolves that block your path. After identifying the actual killing attack, check the corresponding defence in the troubleshooting section.
Does melee simply have no output time in the fog phase?
Some players choose to wait out the phase entirely. Others only use a single quick skill after each dash ends.
Both approaches can work. The difference comes from attack speed, character recovery animation and familiarity with the dash rhythm.
For a first kill, prioritise survival. Once familiar with the rhythm, use one quick-recovery skill after the dash ends. Do not force a full combo.
Do I need to kill all the summoned wolves first?
Community comments frequently disagree on whether to clear the arena or focus the boss.
The page should give a conditional answer based on whether wolves block movement or cause continuous interrupts, rather than a fixed 'clear all' instruction.
Only clear wolves that enter your movement route or continuously stagger you. Wolves far from your path are not worth losing boss visibility.
PROBLEMS & DIRECT ANSWERS
Problems and Direct Answers
Why am I still being one-shot despite decent cold resistance?
Direct answer: The killing blow likely includes physical damage, consecutive hits, or a high-damage attack that requires active avoidance. Capped resistance does not mean you can stand still.
- Confirm whether death occurred in the human, fog or wolf phase.
- Cross-reference the attack table to identify whether it was the dash, leap or ground overlap.
- Check effective life, armour/evasion and recovery — not just cold resistance.
When can melee attack during the fog phase?
Direct answer: For a first kill, focus on movement. Once familiar with the rhythm, use one quick-recovery skill after the boss dash ends and your route is clear.
- Do not attempt full long combos.
- If wolves block your retreat, clear the nearest one first.
- Stop attacking immediately when the next voice cue begins.
Is my damage too low — do I need better gear first?
Direct answer: Not necessarily. First confirm you are using a single-target skill setup, that supports actually match your skill tags, and that your weapon base damage is not behind for the current act.
- Compare weapon base damage against attack/cast speed.
- Verify support gems are compatible with your main skill tags.
- Separate mapping tools from boss tools — do not sacrifice all single-target for area.
Do I need to clear all summoned wolves before attacking the boss?
Direct answer: Only clear wolves that block your movement route, cause continuous stagger, or prevent you from observing the boss.
- Chasing wolves at the arena edge usually costs you more important boss telegraph information.
- If wolves are far from your path, ignore them and focus on positioning.
REWARDS & PROGRESSION
Rewards and Next Steps
Act 1 Completion
Completes Act 1 main story. Unlocks Act 2 campaign progression and the next set of passive points.
Equipment Drops
Standard boss loot table. Focus on items with cold resistance and life affixes for Act 2 preparation.
SOURCES & VERIFICATION
Sources, Verification and Update Log
Patch notes and mechanic sources used to confirm current version, changes and official naming.
Boss, area and reward data used to cross-check entity names, phase relationships and loot categories.
Two independent fight guides used to cross-verify phases, attacks and build-specific handling.
Reddit and forum discussions used to identify high-frequency player failures. Not used as standalone mechanic fact sources.
Update Log
- Corrected phase count to two: the mist sub-phase is part of the wolf transformation, not a separate third phase.
- Fixed the wolf-phase full-health-reset description; removed the prototype 'three phases' wording.
Related content
Information is compiled from public web sources and in-game observations; some visuals are original editorial diagrams. External information and images remain the property of their authors or platforms; contact us for removal requests.