
On this page
Quick Preparation
- Location
- The Dreadnought
- Campaign / Endgame
- Act 2
- Recommended Level
- Level 22–26
- Primary Damage Types
- Physical · Lightning
- Editorial Difficulty
- High
QUICK ANSWER
The Two Most Important Things About Jamanra
1. When the sandstorm begins, immediately locate Asala's safe zone and stand behind her.
2. In phase 2 keep lightning pillars and whirlwind from pinning you against the edge.
3. The final boss's official name is Jamanra, the Abomination—not the Risen King.
4. At 1 HP Jamanra stops attacking and triggers an ending interaction with Asala; after it, Act 2 is complete.
Check lightning resistance and movement speed first, not just damage output.
Stand directly behind Asala. She shields you from the sandstorm damage. Kill the undead that approach.
When lightning pillars and whirlwind overlap, move toward the arena centre, not the edge.
ACCESS & CONTEXT
Location, Access and Failure Cost
Main story progression. No separate entry materials required.
Asala provides a safe zone during the sandstorm. Her position is the key survival anchor.
No material cost. You can retry immediately.
Unlocks Act 3 campaign and the next ascendancy trial progress.
BEFORE THE FIGHT
Pre-Fight Preparation
| Done | Check | Why it matters | Quick fix |
|---|---|---|---|
| Lightning resistance (50–75% ideal) Phase two lightning pillars and melee attacks both deal lightning damage. | At default resistance, consecutive lightning hits in phase two can kill through full life in two hits. | Swap gear for lightning resistance affixes. Even 50% significantly reduces the two-hit kill threshold. | |
| Effective HP (at least 700) Physical melee hits in phase one and lightning in phase two both check your total effective pool. | Below 700 HP, a single unmitigated physical hit followed by any lightning tick is lethal. | Prioritise life on body armour and belt. Do not sacrifice all defence for damage. | |
| Movement speed Determines whether you can outrun the whirlwind and reposition between lightning pillars. | Community reports indicate default movement speed makes some phase-two sequences extremely tight. | Boot movement speed of 20%+ provides meaningful margin. A movement skill adds further safety. | |
| Flask management Save recovery flasks for the phase-two transition and whirlwind sequences. | Phase one is manageable without flasks. Phase two has overlapping damage that requires active recovery. | Do not use all flask charges in phase one. Keep at least two for the phase-two opening. |
PHASE BREAKDOWN
Phase Breakdown
Phase 1 · Phase 1: Physical and Lightning Melee
Trigger: Fight begins. Jamanra uses melee attacks and a spear throw.
Objectives- Learn the lightning melee attack that hits directly in front.
- Dodge the spear throw when you are at range.
- Do not waste flask charges — this phase is manageable with positioning alone.
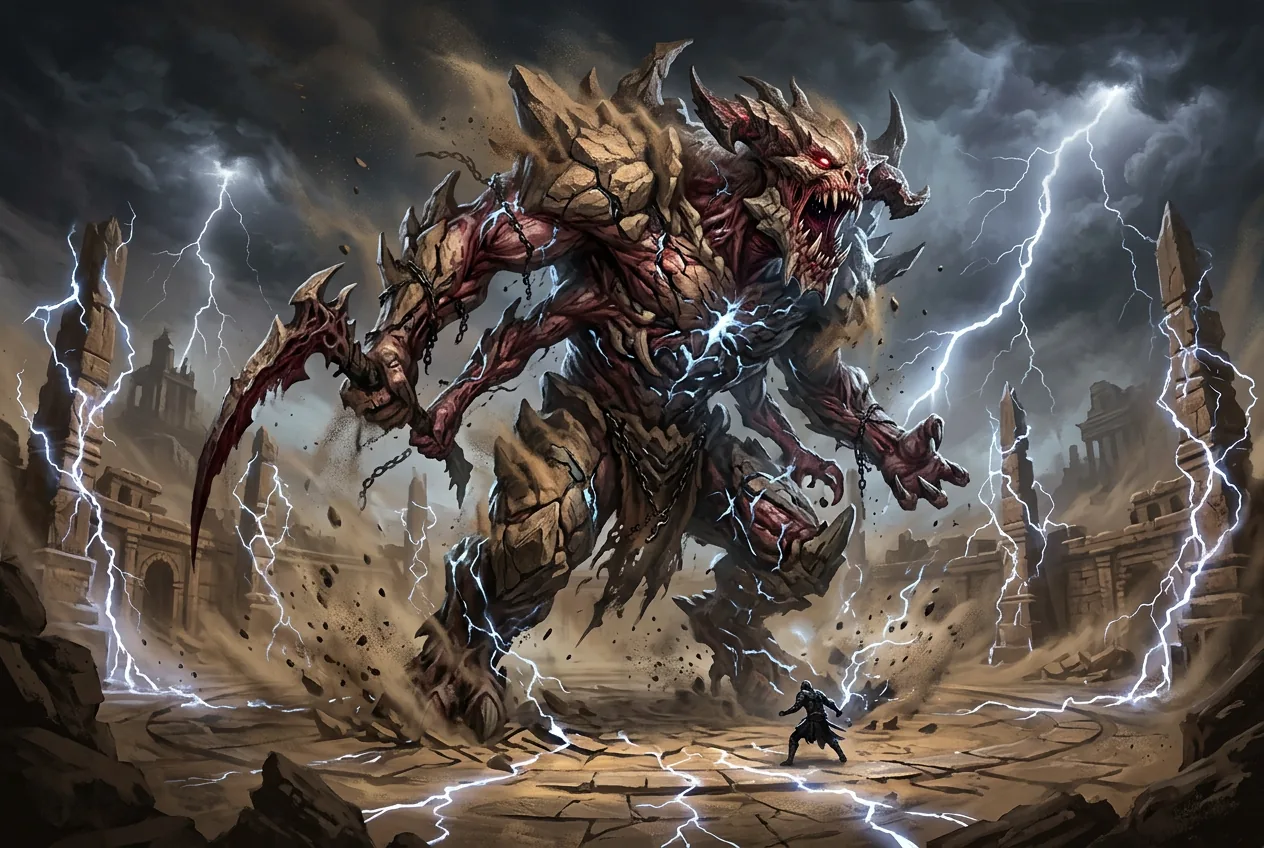
Phase one has two main attacks: a lightning melee strike hitting directly in front, and a spear throw when you are at distance.
Stay to the side rather than directly in front or behind. The melee attack has a narrow frontal cone.
The sandstorm event occurs during this phase. When it triggers, immediately find Asala.
ATTACK REFERENCE
Attack Reference
| Attack | Telegraph | Response | Common mistakes | Danger |
|---|---|---|---|---|
| Lightning Melee StrikePhase 1: Physical and Lightning Melee | Weapon raises with a lightning glow, strikes directly in front. | Stay to the side. The attack hits a narrow frontal cone. | Standing directly in front to maximize melee uptime. | Med |
| Spear ThrowPhase 1: Physical and Lightning Melee | Jamanra pulls back and aims at ranged characters. | Dodge laterally when you see the wind-up. The projectile travels in a straight line. | Backing straight up instead of sideways. | Med |
| SandstormSandstorm Event: Asala Safe Zone | The arena fills with sand. Asala appears with a golden glow. | Move to Asala immediately. Stand behind her. Kill approaching undead. | Trying to DPS the boss during the sandstorm instead of reaching Asala. | High |
| Lightning PillarsPhase 2: Lightning Pillars and Whirlwind | Brief ground markers appear before pillars strike in sequence. | Move between pillar positions. Do not stand still. Watch for the next marker. | Running to the arena edge where there is no room for the next pillar sequence. | High |
| WhirlwindPhase 2: Lightning Pillars and Whirlwind | Jamanra begins spinning and moving toward the player. | Move toward the arena centre, then circle around. Do not run straight away toward the edge. | Running directly away, getting pinned at the wall with no lateral escape. | High |
BUILD-SPECIFIC STRATEGY
Build-Specific Strategy
Melee: Phase one is your safe damage window. In phase two, only enter after the whirlwind ends and lightning pillars have resolved. Do not chase the boss during pillar sequences.
Ranged: Maintain mid-distance. The spear throw is easy to dodge laterally. In phase two, use the full arena width to create space between pillar positions.
Minion: Your minions can maintain damage during the sandstorm while you focus on reaching Asala. In phase two, keep moving — do not rely on minions to tank the whirlwind.
Low movement speed: Pre-position near centre before phase two begins. The whirlwind is your biggest threat — you must start moving the instant the spin begins, not after it reaches you.
- Community feedback suggests default movement speed makes some phase-two sequences very tight. Boot speed is the single most impactful preparation upgrade.
- If damage feels insufficient, verify your single-target setup before attempting the fight — extended fights mean more phase-two repetitions.
VIDEO & TIMESTAMPS
Video Guide
EsportsGG
How To Beat Jamanra in POE2 — Full Act 2 Boss Guide
Complete two-phase fight with sandstorm positioning and phase-two survival.
Open source ↗GoldenTempest
Jamanra the Abomination — Witch Perspective
Caster build perspective showing how ranged characters handle pillar sequences.
Open source ↗COMMUNITY EVIDENCE
What Players Commonly Struggle With
Is Jamanra impossible at default movement speed?
A player reports that repeated lightning pillars and the whirlwind leave almost no time to attack at default movement speed.
This suggests the guide should separate movement problems from damage problems. The fight is designed to be tight at default speed — boot speed is a legitimate preparation step, not an optional luxury.
Default speed is survivable but tight. Adding 20%+ boot speed provides meaningful margin. If you cannot dodge consistently, speed is the first upgrade to make.
I cannot find Asala during the sandstorm. Where does she appear?
Multiple players report dying during the sandstorm because they could not locate Asala in time.
The sandstorm reduces visibility significantly. Players need a clear indicator description rather than just 'find Asala'.
Look for the golden glow. Asala appears at a fixed position relative to the arena. Move toward the glow immediately when the sandstorm starts — do not try to finish your current attack.
Phase two kills me instantly even with lightning resistance. What am I doing wrong?
A player with 60% lightning resistance still dies quickly in phase two. They describe being caught by overlapping attacks.
The issue is likely positional rather than statistical. Overlapping whirlwind and pillars at the arena edge bypasses resistance checks entirely through physical damage and consecutive hits.
Check your position when you die. If you are near the edge, the problem is positioning, not resistance. Pre-position near centre and circle rather than running straight.
PROBLEMS & DIRECT ANSWERS
Problems and Direct Answers
Why does the sandstorm kill me before I reach Asala?
Direct answer: You are likely trying to finish an attack or collect loot before moving. The sandstorm damage ramps quickly — move to Asala the instant it starts.
- Stop any long animation immediately when the sandstorm begins.
- Look for the golden glow indicator.
- Do not try to kill undead on the way — reach Asala first, then deal with adds.
Phase two kills me even with capped lightning resistance.
Direct answer: The lethal combination is usually physical whirlwind damage plus consecutive lightning pillar hits at the arena edge. Resistance alone does not solve a positioning failure.
- Confirm where you are when you die — if near the edge, positioning is the issue.
- Pre-position near centre before the whirlwind telegraph.
- Check effective HP — you may need more total life, not just resistance.
I cannot find any output window in phase two.
Direct answer: Phase two output windows are short by design. Use one quick skill between pillar sequences. Do not attempt full rotations until you have the rhythm memorised.
- Identify the gap between the last pillar and the next telegraph.
- Use your fastest single skill, not a long combo.
- If no safe gap exists, focus entirely on survival — the fight is not a DPS race.
REWARDS & PROGRESSION
Rewards and Next Steps
Act 2 Completion
Completes Act 2 main story. Unlocks Act 3 and further ascendancy trial progress.
Equipment Drops
Standard boss loot. Prioritise lightning resistance and life for Act 3 preparation.
SOURCES & VERIFICATION
Sources and Verification
Patch notes confirming current version and mechanic changes.
Entity data for phase relationships and damage type confirmation.
Two independent guides cross-verifying sandstorm mechanic and phase-two patterns.
Reddit discussions identifying movement speed and positioning as primary failure causes.
Update Log
- Location corrected to The Dreadnought.
- Clarified the final boss is Jamanra, the Abomination (not the Risen King).
- Added the 1-HP ending interaction with Asala.
Related content
Information is compiled from public web sources and in-game observations; some visuals are original editorial diagrams. External information and images remain the property of their authors or platforms; contact us for removal requests.