
On this page
- Remember These Three Things First
- Top search questions: entry, materials, failure cost
- How to Reach the Trialmaster
- Pre-Fight Preparation Checklist
- Combat Phases (Waves)
- Attack and Hazard Recognition
- Build Considerations
- Video Guides
- Community Questions and Evidence
- Common Problems and Fixes
- Rewards and Drops
- Sources and Verification
Quick Preparation
- Location
- Trial of the Sekhemas, Final Chamber
- Recommended Level
- Level 65+
- Primary Damage Types
- Physical · Chaos · Fire
- Editorial Difficulty
- High
QUICK ANSWER
Remember These Three Things First
The Trialmaster is invulnerable during active waves. Only after all constructs in a wave are destroyed does he take damage for 8 seconds.
Each wave adds a new arena hazard. By Wave 3, you face spinning blades, poison clouds and fire jets simultaneously.
Wave 3 — triple hazard overlap with elite constructs
AoE clear speed — waves must die within 20 seconds or hazards stack
Trialmaster's Decree unique map fragment (Trial-exclusive)
FAQ
Top search questions: entry, materials, failure cost
How do I reach the Trialmaster?
The Trialmaster is the final fight of the Trial of Sekhemas; reach the Final Hall after clearing all preceding halls (including the Arbiter of Divinity).
What are the prerequisites?
Clear the Hall of Weight, Hall of Passage, Hall of Storms, and Hall of Judgment (Arbiter of Divinity) in order, then enter the Final Hall.
What does failure cost, and can I retry?
Failure means restarting from the first hall; the attempt cost is included in the trial key, with no separate fee.
What do I unlock by defeating him?
Drops the Trialmaster's Decree (a unique map fragment that upgrades any map to trial difficulty) and other trial-exclusive rewards.
ACCESS & CONTEXT
How to Reach the Trialmaster
Including Arbiter of Divinity
Spinning blades, poison vents, fire jets
No additional cost after preceding chambers
Complete preceding Trial chambers
The Trialmaster is the final encounter in the Trial of the Sekhemas. You must clear all preceding chambers including the Arbiter of Divinity.
Enter the Final Chamber
The Final Chamber is a large rectangular arena with hazard mechanisms built into the floor and walls. The Trialmaster stands on a raised platform at the far end.
Activate the encounter
Step onto the central platform to begin. The Trialmaster summons the first wave immediately.
BEFORE THE FIGHT
Pre-Fight Preparation Checklist
| Done | Check | Why it matters | Quick fix |
|---|---|---|---|
| High AoE clear speed Verify you can clear 6 constructs in under 15 seconds. | Waves must die quickly; each surviving construct adds hazard uptime. | Bring your highest AoE skill setup; single-target is secondary. | |
| Chaos and fire resistance 75% Verify both chaos and fire resistance are capped. | Poison clouds deal chaos damage; fire jets deal fire damage. Both are unavoidable hazards. | Use Topaz and Ruby flasks; craft chaos suffixes on armour. | |
| High movement speed (40%+) Confirm 40%+ movement speed. | Spinning blades require constant repositioning; slow characters get cornered. | Movement speed boots, Tailwind support, or Dash skill. | |
| Sustained DPS for vulnerability windows Verify you can deal 2M+ damage in an 8-second window. | The Trialmaster is only vulnerable for 8 seconds between waves. Maximise this window. | Save burst cooldowns for vulnerability windows; do not waste them on constructs. |
PHASE BREAKDOWN
Combat Phases (Waves)
Phase 1 · Wave 1 — Basic Constructs
Trigger: Stepping onto the central platform.
Objectives- Kill 6 basic constructs (melee and ranged).
- Learn the spinning blade pattern (activates after 10 seconds).
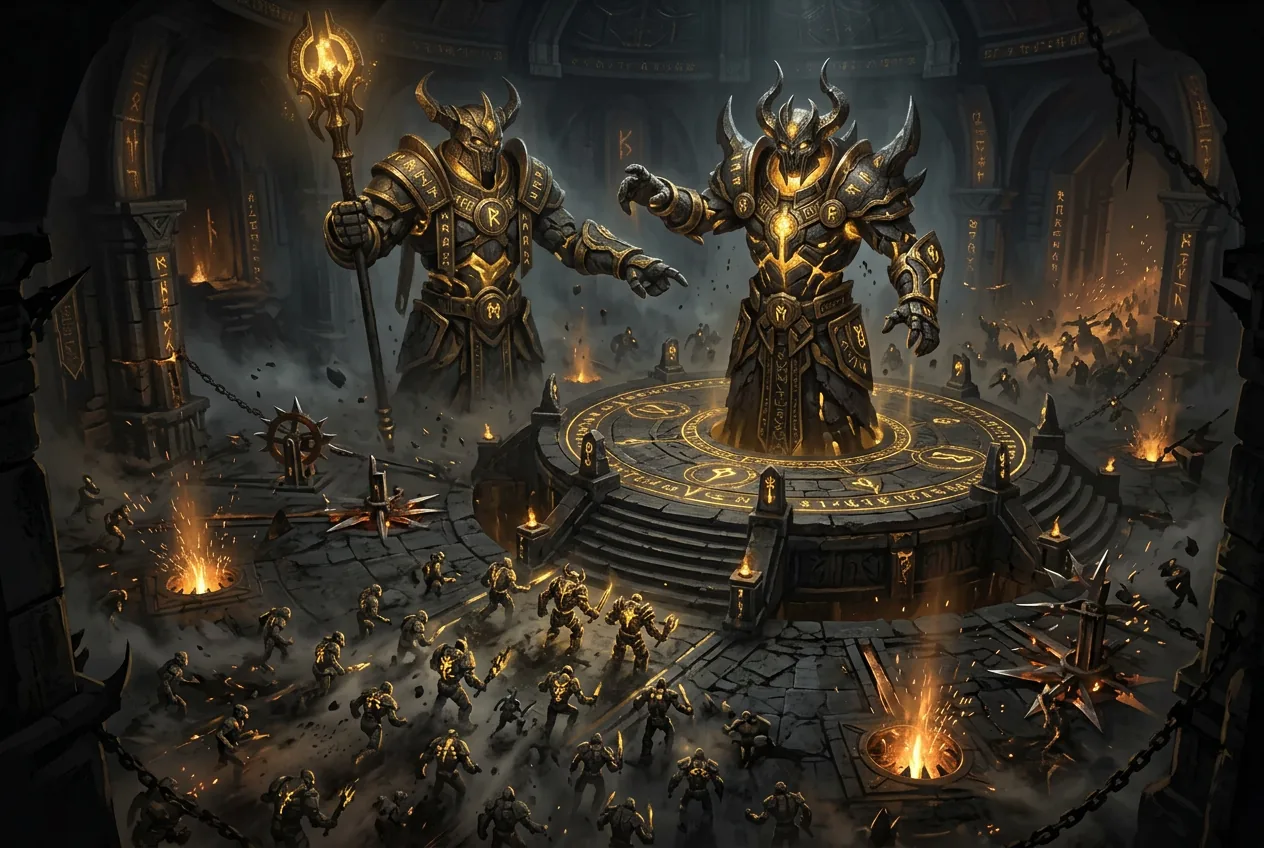
Six constructs spawn: 4 melee (physical slam) and 2 ranged (chaos bolt). Spinning blades activate on the arena edges after 10 seconds.
After all constructs die, the Trialmaster becomes vulnerable for 8 seconds. Burn as much HP as possible.
ATTACK REFERENCE
Attack and Hazard Recognition
| Attack | Telegraph | Response | Common mistakes | Danger |
|---|---|---|---|---|
| Spinning BladesWave 1 — Basic Constructs · Wave 2 — Elite Constructs and Poison · Wave 3 — Triple Hazard and Enrage | Blade mechanisms on arena edges glow red 1 second before activating. | Stay in the arena centre. Blades sweep the outer 3 metres in a rotating pattern. | Fighting constructs near the edge and getting caught by blades. | Med |
| Poison Vent CloudsWave 2 — Elite Constructs and Poison · Wave 3 — Triple Hazard and Enrage | Floor vents hiss and emit green smoke 2 seconds before the cloud forms. | Move away from the vent. Clouds are 3m radius and persist for 6 seconds. | Standing in a cloud to finish killing a construct. | High |
| Wall Fire JetsWave 3 — Triple Hazard and Enrage | Wall nozzles glow orange 1.5 seconds before firing a horizontal beam. | Dodge-roll through the beam or move perpendicular. The beam is at waist height — jumping does not avoid it. | Trying to jump over the beam instead of rolling through or moving perpendicular. | High |
| Trialmaster Chaos BoltWave 3 — Triple Hazard and Enrage | The Trialmaster raises his staff; a purple orb forms in 1 second. | Strafe laterally. The bolt is a slow projectile aimed at your position at cast time. | Ignoring the bolt and getting pushed into poison clouds by the dodge. | Med |
BUILD-SPECIFIC STRATEGY
Build Considerations
The Trialmaster is an AoE clear check. Builds with fast, wide AoE that can clear 10 constructs in under 20 seconds perform best.
Movement speed is critical for hazard avoidance. Builds that sacrifice movement for damage will struggle in Wave 3.
The 8-second vulnerability windows reward burst damage. Builds with high burst cooldowns (rather than sustained DPS) can skip the Trialmaster's HP thresholds faster.
- AoE builds: prioritise clear speed; use single-target only during vulnerability windows.
- Melee builds: use whirlwind or cleave for constructs; save burst for the Trialmaster.
- Caster builds: use wide-area spells (Firestorm, Ice Nova) for waves; save instant-cast for hazard dodging.
- Avoid pure single-target builds; you will time out on Wave 3 construct count.
VIDEO & TIMESTAMPS
Video Guides
COMMUNITY EVIDENCE
Community Questions and Evidence
Is Wave 3 actually possible with all three hazards?
Multiple players confirm Wave 3 is clearable but requires near-perfect hazard awareness. The consensus strategy is to kite constructs in a circular path through the arena centre, avoiding edges (blades) and walls (jets).
We confirmed the circular kiting strategy works. The key insight is that poison clouds spawn at fixed vent locations — memorise the four vent positions and path between them.
PROBLEMS & DIRECT ANSWERS
Common Problems and Fixes
I cannot clear constructs fast enough before hazards overwhelm
Direct answer: Pull all constructs to the arena centre using a circular path. Your AoE should hit all of them simultaneously. Never chase a single construct to the edge.
- Verify your AoE clears 6 constructs in under 15 seconds.
- Check if you are chasing constructs into hazard zones instead of kiting them to centre.
Elites in Wave 2 and 3 take too long to kill
Direct answer: Kill all non-elite constructs first. Elites lose their enrage aura when no other constructs are alive, taking 30% more damage. Then focus elites with burst cooldowns.
- Confirm you are killing non-elites first to remove the enrage buff.
- Check your single-target DPS during vulnerability windows.
REWARDS & PROGRESSION
Rewards and Drops
Trialmaster's Decree
Unique map fragment that upgrades any map to Trial-tier difficulty with bonus rewards. Trial-exclusive.
Construct Core
Unique jewel granting minion damage and construct summoning skill.
Sekhema's Blessing
One-time currency that adds a Trial modifier to any endgame item.
SOURCES & VERIFICATION
Sources and Verification
Article Changelog
- Added a first-half FAQ with high-value search questions (how to enter / material sources / failure cost / retry / unlocks).
- Fixed prototype video placeholder link.
Related content
Information is compiled from public web sources and in-game observations; some visuals are original editorial diagrams. External information and images remain the property of their authors or platforms; contact us for removal requests.