
On this page
- Remember These First
- Top search questions: entry, materials, failure cost
- How to Reach
- Failure Cost & Retry
- Pre-Fight Preparation Checklist
- Combat Phases
- Attack Recognition and Response
- Arena Reading
- Build Considerations
- Community Questions and Evidence
- Common Problems and Fixes
- Rewards and Drops
- Video Guides
- Media Gallery
- Sources and Verification
Quick Preparation
- Location
- The Twisted Domain (Breach Pinnacle)
- Recommended Level
- Level 79+
- Primary Damage Types
- Physical · Cold · Fire · Lightning · Chaos
- Editorial Difficulty
- High
QUICK ANSWER
Remember These First
Xesht is the Breach pinnacle. You reach the Twisted Domain via a Breachstone in the Realmgate on the Atlas; the deeper you go the more splinters you commit (50 / 100 / 150), scaling HP and reward.
At roughly 60% HP he transitions and starts summoning arms from portals and stacking Tul (cold) and Esh (lightning) simultaneously — that overlap is where most deaths happen.
Breachstone (300 splinters) → Realmgate → Twisted Domain gauntlet → boss
Phase 2 Tul + Esh combo and the periodic arm slams
No elemental weakness; cap Cold (Tul freeze) and keep movement speed
Uul-Netol's Embrace (Lineage Support) + Breach Atlas points
FAQ
Top search questions: entry, materials, failure cost
How do I reach Xesht in the current 0.5.4 version?
Farm Breach Splinters from Breach encounters in your maps, or buy them / a Breachstone on the Currency Exchange.
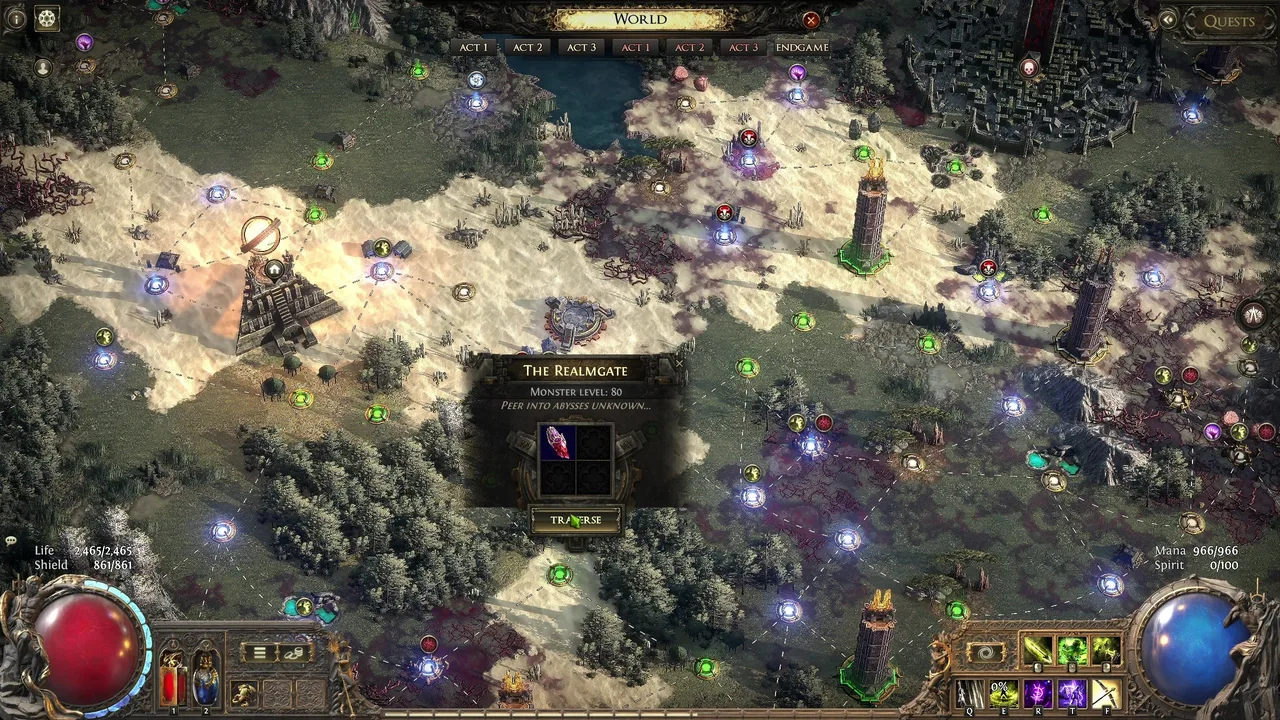
Combine splinters into a Breachstone, place it in the Realmgate on the Atlas (next to the Ziggurat Refuge), and enter the Twisted Domain.
Fight through the Breach gauntlet (kill monsters to keep the timer alive) until the bridge appears and Xesht spawns.
Is the old '300 splinters' rule still correct?
The 300-splinter → Breachstone conversion is still the core access path; what changed in 0.5 is the Hive/Genesis-Tree ladder and that higher splinter investment (50/100/150) sets the fight tier.
Older guides that cite a single fixed HP or a one-attempt rule are outdated — verify against current patch notes.
Why do the Falling Hands keep hitting me?
Each arm teleports in, hovers, then slams after a purple/pink telegraph. The slam has a delay; dodge-roll a beat after the elbow bends, or simply outrange it by running to the arena edge.
At tier 4 up to four arms spawn and they get faster, so the dodge timing tightens.
Why do I die instantly when Tul freezes me?
Tul's ice barrage can Chill/Freeze you; if you are frozen you cannot dodge the following hit. Bring a Thawing or Silver Charm and circle around Tul to break line of sight.
A Frost Wall can also block the icicles entirely.
Xesht or Xehst — which spelling is right?
The official name is Xesht, We That Are One. 'Xehst' is a common typo; both point to the same Breach pinnacle boss.
ACCESS & CONTEXT
How to Reach
From splinters at the Genesis Tree
Scales HP & reward
Limited attempts at higher tiers
By splinter tier (community-estimated)
Farm or buy Breach Splinters
Breach Splinters drop from Breach monsters in your maps. A full stack converts into a Wombgift, which you craft into a Breachstone at the Genesis Tree.
Alternatively buy splinters or a finished Breachstone on the Currency Exchange.
Open the Realmgate
Place the Breachstone into the Realmgate on your Atlas (near the Ziggurat Refuge). Six portals open to the Twisted Domain.
Survive the Breach gauntlet
Inside, you must keep a countdown alive by killing Breach monsters. Loot pools at the end. Roughly two minutes of survival gets you to the boss bridge.
Commit splinters for tier
The number of splinters you invest (50 / 100 / 150) sets the tier: ~2.9M / 6.5M / 14.5M HP and better loot odds. Pick a tier you can actually clear.
OVERVIEW
Failure Cost & Retry
A failed Xesht attempt costs the Breachstone you invested plus the splinters tied to its tier. Xesht does NOT regenerate HP, so you can log out / Alt-F4 and re-enter without losing progress on the boss fight itself — but you still consume the stone.
At tier 0 you have unlimited retries; from tier 1+ attempts become limited, so learn the moveset at tier 0 first.
- Death = lose the Breachstone (and its splinters).
- Boss fight can be exited safely via logout; it does not pause like a campaign boss.
- Higher tiers gate the best loot odds behind limited attempts.
BEFORE THE FIGHT
Pre-Fight Preparation Checklist
| Done | Check | Why it matters | Quick fix |
|---|---|---|---|
| Capped Cold Resistance Verify cold res is at the 75% cap. | Tul's ice barrage deals Cold damage and can Freeze you, which leads to a guaranteed follow-up hit. | Use a Thawing Charm, cold-crafted gear, or Purity of Elements. | |
| Movement speed 25%+ Boots should grant at least 25% movement speed. | Many attacks are long-range tracking blasts; mobility is your main dodge tool. | Movement-speed boots, Quicksort, or a movement skill on low cooldown. | |
| Thawing / Silver Charm Slot a charm that removes Chill or Freeze. | Getting frozen during the Tul barrage is the most common one-shot cause. | Thawing Charm (removes Freeze) or Silver Charm (removes Chill). | |
| Single-target DPS check Confirm you can burn ~3M+ effective HP before enrage-style pressure. | Higher tiers have hard DPS windows; a slow build runs out of room. | Bring focused single-target; save AoE for the gauntlet mobs only. |
PHASE BREAKDOWN
Combat Phases
Phase 1 · Phase 1 — Opening (100%–60%)
Trigger: Fight begins when you cross the bridge into the arena.
Objectives- Learn Finger Gun, Triple Blast, Hand Smash, Burrow and Sun Orb.
- Stay close and circle behind to negate aimed shots.
Xesht opens with single attacks: Finger Gun (slow aimed sonic orb), Triple Blast (three quick blasts while tracking), Hand Smash (homing hand that slams), Burrow (chases, then clap-slam), and a thrown Fire/Sun Orb.
Most aimed attacks have a long wind-up; circling behind him forces a 180° turn and wastes the shot.
ATTACK REFERENCE
Attack Recognition and Response
| Attack | Telegraph | Response | Common mistakes | Danger |
|---|---|---|---|---|
| Finger Gun (Sonic Orb)Phase 1 — Opening (100%–60%) · Phase 2 — Hiveborn Powers (60%–0%) | Xesht raises his right hand, charging an orb that tracks you. | Circle behind him as he fires; the shot misses as he slowly turns. Or dodge-roll perpendicular as the orb passes. | Standing still to finish a cast. | Med |
| Triple BlastPhase 1 — Opening (100%–60%) · Phase 2 — Hiveborn Powers (60%–0%) | Two glowing lights appear at his hands; he fires three times, re-aiming between shots. | Stay close, dodge-roll past him to force a 180° turn, then roll back behind before the next shot. | Being far away with no room to dodge three shots. | High |
| Hand Smash (Falling Hands)Phase 1 — Opening (100%–60%) · Phase 2 — Hiveborn Powers (60%–0%) | A hand hovers above you, tracking, then a purple/pink outline forms before the slam. | Watch the shadow; dodge-roll out when the hand glows. This is his hardest-hitting attack. | Panicking early and rolling into the slam radius. | High |
| Burrow & ClapPhase 1 — Opening (100%–60%) · Phase 2 — Hiveborn Powers (60%–0%) | Xesht burrows and chases; after catching up he claps both hands, slicing the ground in two lines. | Run wide circles around the inner arena edge; re-enter only after the slices finish. | Standing still thinking he left. | High |
| Summon Tul (Cold Barrage)Phase 2 — Hiveborn Powers (60%–0%) | A white icy hand pulls Tul from a portal; she fires a cone of ice projectiles that tracks you. | Circle around Tul to break line of sight; a Frost Wall blocks the icicles. Bring a Thawing Charm. | Tanking the barrage without charm or wall. | High |
| Summon Esh (Lightning Ring)Phase 2 — Hiveborn Powers (60%–0%) | A blue hand pulls Esh; a ring grows then expands outward as a lightning shockwave. | Dodge INTO the ring (toward the hand) or outrange it by standing outside the arena. | Running sideways into the expanding ring. | Med |
ARENA READING
Arena Reading
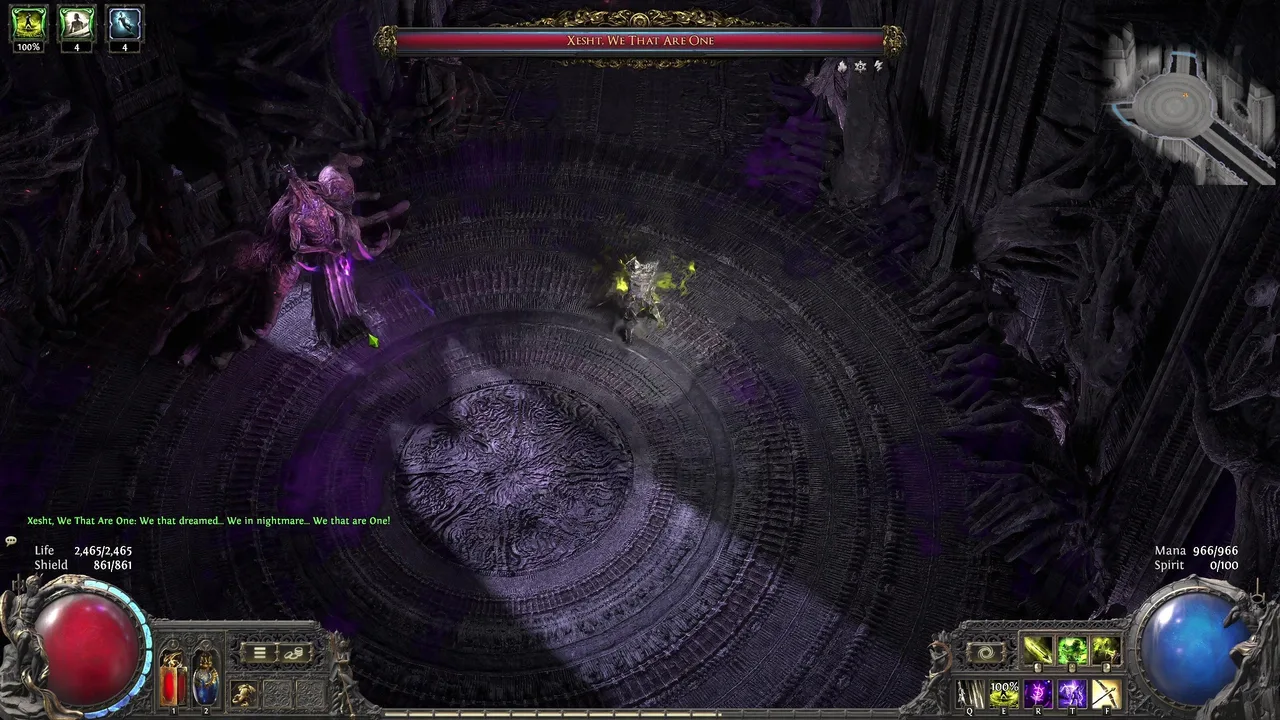
The Twisted Domain boss arena is a large circular space with raised walkways at the edges. The walkways are your friend during the Tul+Esh combo — you can outrange Tul's barrage there.
There are no obstacles in the centre, so ground effects and the homing hands are the main hazards. Keep moving in a wide loop rather than hugging a corner.
- Use edge walkways to outrange Tul during Combo Summon.
- Never stand still — almost every attack tracks your position.
- The bridge you arrived on does not retreat; you cannot leave mid-fight by walking out.
BUILD-SPECIFIC STRATEGY
Build Considerations
Xesht has light resistance to fire/cold/lightning and no armour, so Physical and Chaos damage are your best friends. High movement speed beats raw defence because most deaths come from failed dodges, not chip damage.
Because the fight never pauses, you cannot re-position during a menu. Plan your flask and charm usage before engaging.
- Melee: stay glued to Xesht and circle behind during aimed attacks; punish during Hand Smash recovery.
- Ranged: use the full arena diameter; kite Hand Smash and Burrow while keeping Tul in view.
- Minion: keep a mobile setup; minions can body-block the homing orbs but die fast to arm slams.
- Low-movement builds: take the edge walkways and pre-aim; do not try to out-trade the combo.
COMMUNITY EVIDENCE
Community Questions and Evidence
Why do the Falling Hands always catch me?
Players report the arm slams feel unavoidable until they learn the delayed timing — the slam lands a beat after the elbow bends, not on the initial portal flash.
We confirm the slam has a fixed post-telegraph delay; rolling immediately on the purple flash is too early. Roll as the hand begins to descend.
Wait for the elbow-to-down motion, then dodge-roll. At tier 4, four arms spawn faster, so keep to the edge.
Why do I die the instant Tul freezes me?
Forum posts note that the cold barrage stacks Chill quickly; a Freeze during any other attack removes your only escape.
Our testing shows a Thawing Charm or Frost Wall removes the risk entirely. Circle Tul to break line of sight.
Slot a Thawing Charm and keep moving around Tul; do not facetank the barrage.
PROBLEMS & DIRECT ANSWERS
Common Problems and Fixes
I keep dying to the Tul + Esh combo in Phase 2
Direct answer: Move to the walkways to outrange Tul, then dodge Esh's expanding ring by stepping toward the hand. Break line of sight on Tul with a Frost Wall if needed.
- Are you on the edge walkway?
- Do you have a Thawing Charm?
- Are you dodging into Esh's ring, not sideways?
The Breach gauntlet timer runs out before I reach Xesht
Direct answer: Use chain/spread/fork effects to clear packs fast and keep the timer alive. Stay at the circle edge and attack inward; do not wander.
- Is your clear speed high enough?
- Are you staying on the Breach circle edge?
My DPS is fine in Phase 1 but I run out of room in Phase 2
Direct answer: Drop to a lower tier (50 or 100 splinters). The 150-splinter tier has a brutal HP wall and faster arm slams — only attempt it on a geared build.
- Are you at the right splinter tier?
- Are you over-investing splinters?
REWARDS & PROGRESSION
Rewards and Drops
Uul-Netol's Embrace
Lineage Support Gem — a major chase unique for the league. Trade value scales with demand.
Breach Atlas Passive Points
Requires beating Xesht at each splinter tier to fully unlock the Breach passive tree.
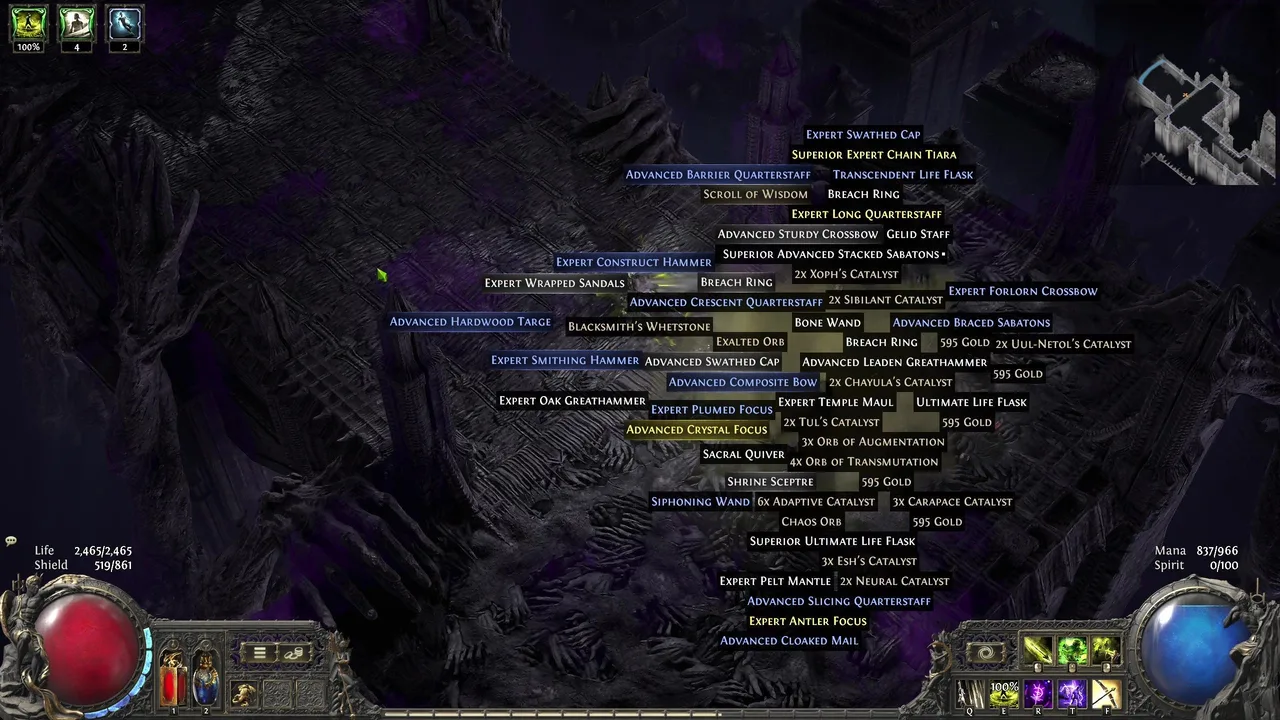
Breach Rings & Catalysts
Common drops; Chayula's / Flesh Catalysts and Breach rings drop from the gauntlet.
VIDEO & TIMESTAMPS
Video Guides
Hunter
Verified boss-fight footage
What to watch for: Verified creator recording of the boss fight.
Open source ↗Zeraldr
Alternate creator footage
What to watch for: Verified creator recording of the boss fight.
Open source ↗MEDIA GALLERY
Media Gallery
SOURCES & VERIFICATION
Sources and Verification
Official Patch Notes — https://www.pathofexile.com/forum/view-thread/3975218
PoE2 Wiki — https://poe2wiki.net/wiki/Xesht,_We_That_Are_One
Mobalytics Guide — https://mobalytics.gg/poe-2/guides/xesht
Maxroll Guide — https://maxroll.gg/poe2/bosses/xesht
Article Changelog
- Initial version generated from 0.5.4 patch notes and community guides, including phases, attack table, community evidence and rewards.
- Videos embed verified creator boss-fight recordings (watch?v= format).
- Promoted to published after PC content verification.
- Media art and video IDs replaced with verified official/creator sources.
Related content
Information is compiled from public web sources and in-game observations; some visuals are original editorial diagrams. External information and images remain the property of their authors or platforms; contact us for removal requests.